Sunday, September 21, 2014

For Family...

Last week it hit me: I've grown tired. Tired of standing at the open freezer thinking, "Hmm...what can I make tonight?" Tired of going back to old stand-by dinners because I hadn't planned. Time to get back to menu-planning. Not only does it kick my butt into gear, it helps with our grocery budget. We don't get what we don't need, or things I pick up "just in case." So, yesterday I sat down with my piles of cookbooks and cooking magazines and planned my menu. For around $200 (plus the price of whatever items I had left in the freezer and pantry), I have a menu for the next 2 weeks! When planning a menu, I try to make sure I add foods that are the favorite of each of my family members. Tonight was for Kiersten.

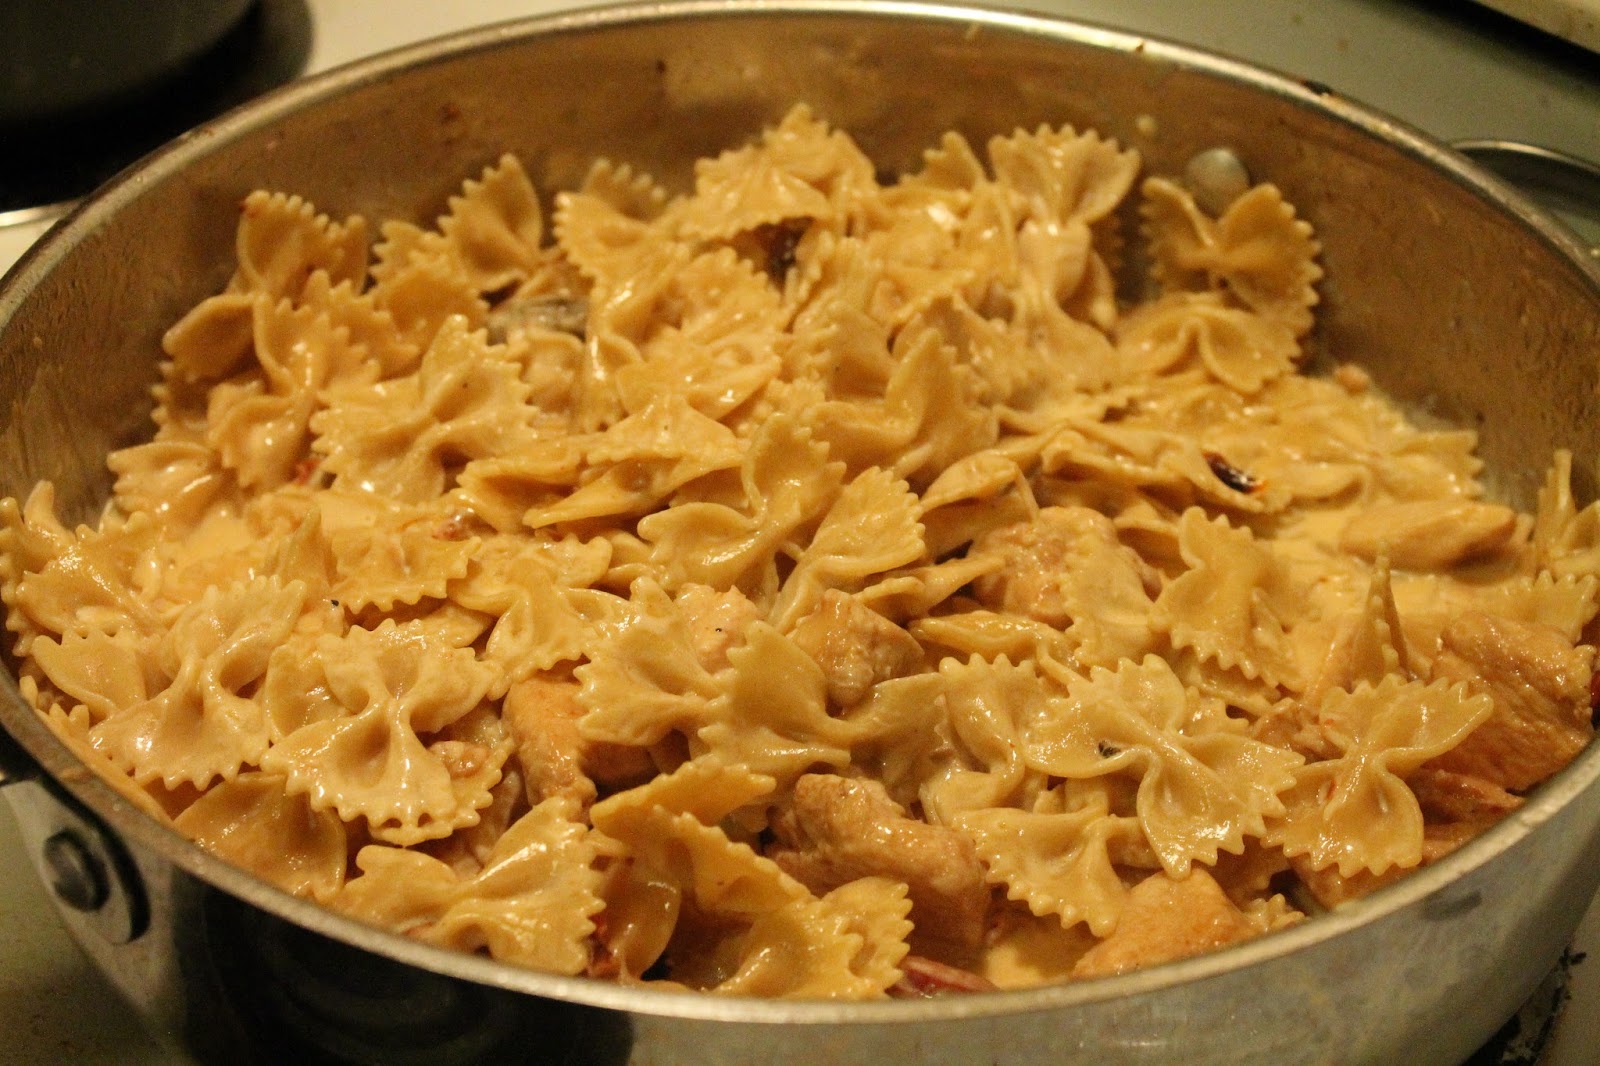
First up, two recipes I've just recently tried: Pioneer Woman's "The Best Baked Beans Ever," and Paula Deen's bacon-wrapped chicken, posted by another blogger. I'll lead you to those recipes here. I've actually blogged before about the chicken.


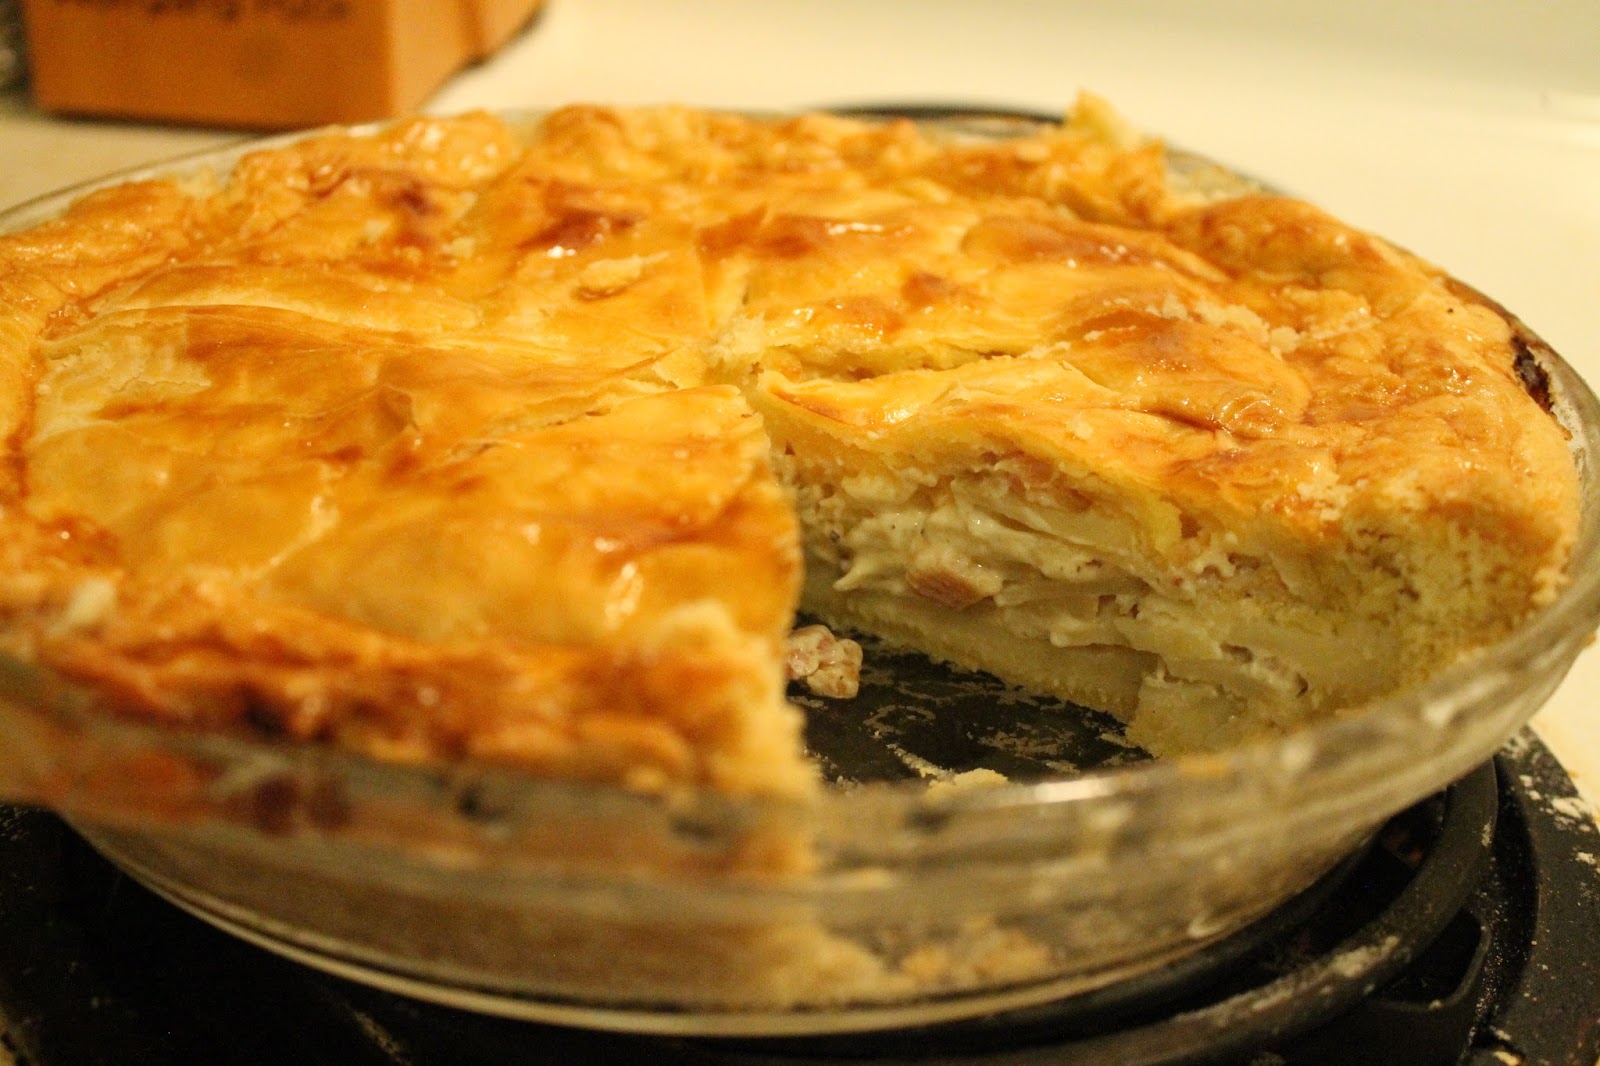
The newest member of my kitchen repertoire would be the divine au gratin potatoes. Originally intended to become au gratin mashed potatoes from Cuisine at Home magazine,  that soon changed. After I sliced the potatoes with one of my new favorite tools, Richard and I decided they were too pretty to turn to mush!! So I layered them in my 9x13 and topped them with white sharp cheddar cheese.  The recipe calls to mash them once they've boiled for 30 minutes, then top with Parmesan cheese and chives. What I ended up doing was much easier, less time-consuming, and much tastier, in my opinion! Even Miss Picky ate them up! One of the parts I love is that there is absolutely no butter in this recipe!!  Not only does that cut out a ton of fat, it also keeps the sauce from becoming an oily mess as it cools.

My Kuhn-Rikon Mandoline. I LOVE THIS!


Boiling the potatoes in the milk/cream mixture

Browned cheese!! Even better: this is white cheddar!

Au Gratin Potatoes (adapted from Cuisine at Home Magazine)
4 lbs Golden Russett potatoes
2 c Half & Half
1 cup of milk (I used 2%)
1 cup cheddar cheese (I didn't measure - just grated right onto the potatoes!)

Heat oven to 350. Slice potatoes as thin as possible. Add to large pot with the half & half and milk. Bring to a boil & let boil for 15 minutes, stirring frequently.
Pour into a 9x13 dish (it will be very full!)
Top with cheese, bake for 30 minutes. 
This makes for a pretty dense layer of potatoes. Feel free to cut back!

The baked beans had some serious kick. In the recipe, she says to feel free to add jalapeños to the pepper & onion mixture. Well hello! I have quite a few in my freezer, as we have some growing in our garden. I added 2. That was probably one too many. I had made enough for half of a recipe, but ended up adding more beans to level out the spice. But even after that, it was still pretty spicy. However, the kids ate it up without one complaint about the spice! Love it! 

Man, that's a beautiful dish! After seeing the sides,Richard asked how many people we were having over for dinner.

The bacon-wrapped chicken is something Kiersten is constantly requesting. If you've read my previous posts, you'll see it discussed before. As always, it was a hit. 

For dessert, the kids had Edy's fruit popsicles. Mainly because the baked goods weren't done until they were in bed. A friend asked for the recipe to what most people call Monster Cookies. In my cookbook, they're called Peanut Butter Jumbos. The reason for both those names is the size. However, since we're TRYING to be good, I made them a normal cookie size. The recipe also calls for M&Ms, but we didn't have any. I like them just fine this way, though. 

My "milk" and cookies. And by milk,
I mean Kahlua & Cream. :-)

Peanut Butter Jumbos
1/2 c (1 stick) butter, softened
1 c packed brown sugar
1 c granulated sugar
1 1/2 c peanut butter
3 eggs
2 t baking soda
1 t vanilla
4 1/2 c rolled oats
1 c semi-sweet chocolate chips*
1 c M&Ms*
Heat oven to 350. Lightly grease cookie sheet, or line with parchment paper. Beat butter, sugars, PB, and eggs in large bowl until blended. Blend in baking soda, vanilla, and oats until well mixed. Stir in chocolate chips & M&Ms. Scoop out about 1/3 c of dough for each cookie. Place on cookie sheets, spacing about 4 inches apart. Press each cookie to flatten slightly. Bake 15-20 minutes or until firm in the center. Remove to wire racks to cool.

*For my own baking, I used 2 cups of chocolate chips in place of 1 c each of the chips and candy. Also, I used a heaping tablespoon of batter, and baked for 10 minutes. 

This made 4 dozen normal-sized cookies.

Time to get off to bed. I'm hoping to get up and Zumba EARLY in the morning. That way I don't feel so guilty about eating all these wonderful foods! 


Tuesday, October 15, 2013

The Chill in the Air...

...means fall is here! Time to make all things apple and/or pumpkin. For the first time in the four years we have lived here in Asheville we made a trip to a local orchard. Our chosen destination: Sky Top Orchard in neighboring Henderson County. Being one of the first nice Saturdays in fall, it was packed. We were extremely lucky in finding a parking spot right at the store. 

First stop, apple cider donuts. We'd heard these were really tasty, and they did not disappoint!

After stopping at the play area, we were finally off to pick some apples! Our choice for the day were Mutsus. They're pretty large, spotty, super juicy, crisp, and sweet with a slight tartness to them. I already had a plan in motion for these babies. We'd gotten some Granny Smiths from our Farmers' Market, and my recipe called for a mix of tart and sweet. What did I make? Only one of the best apple pies ever, complete with homemade crust!


I've been hanging on to this recipe for about two years. I tore it from Women's Day magazine. It has both the pie crust recipe and the filling recipe. The crust recipe can be found here. I'll type out the filling recipe, so I can note any modifications I made. I only used half of the apples, because a) the crust was really thin for that amount and b) it would have made it a pie mountain. If you like apple pie mountains, go for it!

Rustic Apple Pie

1 Basic Flaky Pie Crust
2 lb sweet baking apples (I used Mutsu; they recommend Jonagold, Ida Red or Golden Delicious)
1 lb tart baking apples (They recommended, and I used, Granny Smith)
1 Tbsp AP flour
1/4 tsp ground cinnamon
3 Tbsp sugar, divided
1 large egg, slightly beaten

Heat oven to 375 degrees. Working on a piece of parchment paper, roll the pie crust into a 15-inch circle (mine was really thin). Slide paper, with crust, onto a baking sheet.

In a large bowl, toss the apples, flour, cinnamon, and 2 Tbsp of the sugar together. Pile the apples on top of the crust, leaving a 3-inch border. Fold the border over the apples.

Brush the crust with the egg. Sprinkle the entire pie with the remaining Tbsp of sugar and bake until the crust is golden brown, and the apples are tender, 55-65 minutes.  Let stand at least 30 minutes before serving. 

I think we waited maybe 15 minutes. I've made this twice, so have used up all the apples the recipe calls for, and we amped it up by having our slices with vanilla ice cream. 


Fall also means continuing our family birthday lineup. Next up was Richard's birthday week. My gift to family for birthdays is the cake/dessert of their choice. I don't think I've made anyone the same thing more than once. I pored through my recipes and found 6 items I knew Richard would absolutely love. About half were chocolate with caramel, half with chocolate and peanut butter. Those are his favorite flavor combos. His choice? Chocolate-Caramel Cheesecake. It was such a hit that Kiersten has requested it for her 7th birthday. In 11 months. I have to admit, it was probably the best dessert I've ever made, and I've made so many that I'm sure there are some I've forgotten.

What a beautiful piece of yummy goodness.
The hardest part about this was converting everything from grams to ounces and Celsius to Fahrenheit, as the author of the recipe is Swedish. Thankfully I have a kitchen scale, so I could be pretty accurate. If you don't have one, I've included other measurements for you.

Crust:
300g Oreos (10.5 oz, which amounted to about a row and a half), crushed
100 g butter (3.5 oz, 7 Tbsp.), melted

Filling:
3 pkgs cream cheese
1 can sweetened condensed milk
1 dl sugar (3.4 oz, a very scant 1/2 c)
4-5 Tbsp lemon juice (I left this out, as I don't like lemony desserts, especially in chocolate!)
2 tsp vanilla extract
3 large eggs
100 g dark chocolate (4 oz, which is 2 squares of baking chocolate)

Caramel topping:
8 oz heavy cream
2/4 c sugar
2 Tbsp butter

Chocolate Ganache:
2 squares chopped dark chocolate
3 oz heavy cream

Choose and grease your springform pan: The author used a 7", mine was 9". The smaller one will produce a taller cake.

For crust, combine crushed Oreos with butter and press onto the bottom and up the sides of your springform pan. Cover the bottom & the sides halfway up with foil. Refrigerate while preparing the filling.

Heat oven to 325 (160 C). Boil water in saucepan for the water bath.

For the filling, in a bowl, beat cream cheese and condensed milk until smooth. Add sugar, eggs, and vanilla. Beat until fully mixed.

Melt chocolate, then let cool. Add to 1/3 of the cheesecake mixture (about 2 c).  Spoon the chocolate batter into crust, then pour in the remaining batter. 

Place pan in a large pan (I used my metal roasting pan), and surround halfway with the boiling water.  

Bake 1 hour and 15 minutes. Let cool, then place in fridge for 6-8 hours. 

Caramel:
Carefully heat sugar in saucepan without stirring. Once it turns amber, swirl the sugar in the pan until melted. Remove from heat.
Add butter to sugar, stirring constantly. (this could be dangerous, as it has the potential to splatter)
Once incorporated, put back onto heat, adding cream gradually.
Let boil a few minutes until smooth, then remove from heat. Let cool, then pour in a container until needed. If you will not need it until the next day, refrigerate it, and let it come to room temp when you use it. Once the cheesecake has been in the fridge for the allotted time, pour the caramel over the cheesecake, spreading it with a spatula until it goes over the edges of the cake. Put the cake back in the fridge while you make the ganache, so the caramel may set.

Ganache:
Chop the chocolate & place in a bowl. Heat cream in a saucepan until it is very hot, but not boiling. Pour over the chocolate & let sit for about 30 seconds. Then carefully stir until the chocolate is shiny and smooth. Let cool, then pour over the cake using the same method as the caramel. Refrigerate the cake until the ganache has set. Then serve. I cut ours into 16 slices, and that was rich enough! The kids each ate half of THOSE slices, except when Nolan forfeited his last slice. Kiersten had the same amount as we did!

Next in line is mom. She's requested individual chocolate & peanut butter cheesecakes. Should prove to be fun and interesting! 


Thursday, September 19, 2013

A Blog Through the Fog

Okay, folks. You'll have to bear with me this morning. I'm trying to get this done before my tiny tornado wakens. It's early, and I'm still on my first cup of my instant-human juice, so I may not make too much sense. I've already deleted my first attempt at this. This is exactly why, when they were babies, Richard had early morning "duty" with the kids, and I always stayed up late with them. We complement each other well that way. 

Another way we complement each other is that he's an organizer, and someone who always has to be doing something helpful. Give him a job and he feels useful. He's very much like his mom that way. So, he serves as my sous chef when he can. He gathers all my ingredients. Or to be fancy, my mise en place. Can you tell I like watching reality cooking shows? Oh yeah...I've already made sure that "Top Chef: New Orleans" is set to record next month. And more than once, Richard and I have contemplated having him send my name in to Food Network telling them I'm a horrible cook and should be on "Worst Cooks in America." Have you seen that show? They go from barely boiling water to cooking things like duck confit! Holy duck fat, Batman!


Anyway, the point is, I have help in the kitchen. Normally. This week, the food has been made either late at night, or before Richard comes home. So, no help! He has truly spoiled me.


First up we have breakfast. I promised Richard I'd make a savory breakfast. After the awesome cinnamon rolls and sticky buns, we'd had enough sweet breakfasts to last a while. I made this Sunday night to have Monday morning and throughout the week. I turned to a recipe in my torn-out magazine pages I'd had for a while, Melissa d'Arabian's Potato-Bacon Torte. As with a lot of my recipes, I gave this one a tweak. Quite a tweak, actually. I can't exactly afford Gruyere, so I subbed in Swiss. And, it only called for 1/4 cup. Being a turophile (fancy word for "cheese lover"), I piled on the cheese. If you're not as excited as I was to make your own crust, you can buy ready-made crust at the store, and you'll be perfectly fine. I also used red potatoes, as that's what I had on hand. The only thing about this I didn't like was my own fault. I didn't roll out the bottom crust enough, so it was way too thick.


I'm pretty proud of the slicing job I did. This is
probably one of the prettiest presentations
I've done in a while.
While this was definitely tasty, there are some changes I'll make for next time: 

1) Make the cheese half Swiss, half cheddar. I think this will give it more of a cheesy heartiness. We've been shredding some over our slices before heating them up each morning, and it's made a big difference. 2) More bacon! Dividing four slices between the two potato layers makes it a game of "Find the bacon."


Next up was Monday night's dinner. Lemon-herb roasted chicken. These past few years I've been making my mom's to-die-for roasted chicken, using a mix of softened butter, minced garlic & a local "Rooster Rub" garnered from Coates Produce at the WNC Farmer's Market (we always buy from them - they rock!). I take that & rub it all on and in the chicken. Well, I was wanting to try something new, so I scoured Pinterest for ideas. I found a few, then took some of those ideas and made my own. Here goes:


Oil "rub" (make this twice, each in its own bowl):


2 Tbsp olive oil

1 Tbsp lemon pepper
1 Tbsp minced garlic
1 Tbsp Italian seasoning

1 whole chicken
1 lemon, thinly sliced

Heat oven to 425 degrees. 


Add whatever veggies you like. I added about 3 red potatoes and some carrot chips. Other recipes had celery and different root veggies. 

Place the chicken in whatever vessel you normally use (I use a Pampered Chef stoneware baker). Make the oil rubs. With one, slather the chicken, in and out, making sure to pour some under the skin. Place your veggies in a bowl or zip top bag, along with the second oil rub. Mix well. Add veggies to the pan. Place lemon slices both on AND inside the chicken. 


Cook for half an hour, then reduce oven temperature to 350 and cook for an hour. 
My oven cooks unevenly, and I turned it too late.
So it looks like a girl who fell asleep while tanning.

This was definitely a success. One more roasted chicken recipe in my arsenal!


The next new blog-worthy recipe was last night's. Wednesdays are hectic once the afternoon hits. Yesterday was even more so, as Kiersten had early release and was home by 1. Wednesdays are church nights, so I had to have dinner ready to go by 5, eaten by 5:30. It also has to be package-able, just in case Richard can't make it home in time to eat it, and has to eat it while Kiersten is in choir practice. Keeping this in mind when planning our weeks-long menu, I put this recipe for Spicy Chicken Romano on the calendar. Man, was it tasty. I gotta tell ya, I'm really looking forward to the leftovers from this one. And there were plenty! We didn't have artichoke hearts, so those weren't added. Even though I'm not crazy about them, Richard loves them, and I would have added them for him. I also added an entire box of Barilla Plus Mulitgrain Farfalle. Doing this ensured we'd have plenty for leftovers. It also had us actually eating less than a serving of the meat.  Target didn't have andouille sausage (what they hey, Tar-zhay?), so I got Johnsonville turkey sausage. But you'd better believe I'm going to spice this baby up even more with andouille next time. Kiersten complained that it wasn't spicy enough.  Man, I love this kid. Can you tell I ate lots of Mexican food while I was pregnant with her?
Just look at all that creamy pasta goodness!
Lunch time can't get here quickly enough!

This weekend the kids and I are going to an apple orchard. You can just imagine all the goodies that will come from that trip! Then on Sunday I'll be making Parmesan-crusted pork loin and ravioli with prosciutto cream sauce. More on that next week!


Till then, stay hungry, my friends!


Sunday, September 15, 2013

Inspiration from the Teacher's Lounge

Everyone likes freebies, right? Well, teachers are no exception. Put a freebie in the teacher's lounge, and it will get snapped up in a heartbeat. Food, books, magazines, even condiments have been placed on the "come and get it" table in almost every teachers' lounge I've seen.

This week's entry came from a freebie in the W. Henderson HS lounge: Southern Living Magazine. Someone graciously left the September 2012 issue on the table around November. I picked it up, enticed by all the caramel apple-themed recipes. With Thanksgiving being spent in Key West, I knew it would not be used during that holiday season, but I did know it would get used. 

Craving fall desserts, and after getting way too many apples at a produce stand, I knew anything pumpkin would be out of the question. I pored over my apple recipes and decided to pull this gem from that magazine: Caramel Apple Coffee Cake. The day I made this, Richard and I had a late afternoon "date" sans kids. It was heavenly. We trekked to Hickory Nut Gap Farm for their fresh pork sausage and some amazing apple cider, then headed to Biltmore Village. To read more about the weekend, check out my family blog.
This is kept refrigerated, but of course is
best when heated. The Farm Store sometimes
serves & sells it hot, by the cup, so you can drink
while you shop. It is my favorite non-coffee
fall (and winter) drink.
As usual, I got started on the cake after dinner. The prep work isn't that long. The most time was spent cracking pecans. The process took even longer once Nolan saw what I was doing and kept sneaking pieces out of my measuring cup.
My little pecan thief.
Once the shelling was done, I got to the actual mixing and baking part. First you soften the apples in a pan, then make streusel and caramel toppings. Then the cake batter. The batter is then poured into a springform pan, layered with apples, caramel and streusel, then baked 35 minutes; covered loosely with foil, then baked another half-hour. It cools in the pan on a rack for half an hour, then after removing the sides, cools another hour, at least. THIS is where all the time-suck happens. Maybe one of these days I'll actually finish a dessert we can eat the same day! Once it cools, another drizzle of caramel is added. This is what it looked like after the last step:


Apparently, the streusel topping is very thirsty, because when I looked at it this morning, all that caramel had seeped into it! No matter, it was still extraordinary. It's as if an apple crisp and a coffee cake had a baby. I've made a peach cobbler coffee cake that is similar, but this is much better. With the leftover caramel sauce, I made this caramel apple dip I found on Pinterest. It's divine. I have a feeling it will get eaten up quickly, even by my pickiest eaters.

We heated up our servings along with mugs of cider, and enjoyed it while Nolan was napping. It adds an extra layer of satisfaction when you can have a delectable dessert without children yelling.
Welcome, Fall!


Monday, September 9, 2013

Birthday Spectacular

Settle into your seats, guys. This is most likely going to be a long one. I feel like I have a hangover. A post-party hangover. What's even more interesting is that it wasn't really even a party. Kiersten's birthday was last Friday, and in my grand birthday-celebrating tradition, we made it a week-long event, complete with lots of baking and including her favorite menu items at dinner. I also tried my hand at a marbling/tie-dye technique on some stretched canvas to make a sign I knew she'd love. 

For her birthday breakfast, I made the sticky bun version of the cinnamon rolls I'd made for her first day of Kindergarten.
Look at all that caramel-pecan goodness!

Sticky Buns with Toasted Pecans

Caramel topping:
3/4 c packed brown sugar
1/4 c heavy cream
2 Tbsp light corn syrup
1/2 tsp table salt
 1 c chopped pecans, toasted (one of their magazines had a tip to actually "toast" them in the microwave for 1 minute - genius! I always burn mine in the oven!)

Prepare the cinnamon rolls all the way until you have sliced the dough logs into rolls to be put into the tray.

Sometime in the 2-hour rising period I made the caramel topping:

Boil brown sugar, cream, corn syrup, and salt in a saucepan over medium-low heat, 2 minutes. Pour caramel into prepared pan, then sprinkle pecans over caramel.

Heat oven to 375 degrees.

Once your rolls are ready, place over the caramel mixture. For presentation sake, leave a large space between rolls. I didn't, and they were pretty compact. We weren't looking for gorgeous presentation, though, so ours were tightly packed. Cover with a towel and let rise until puffy, about an hour; remove towel.

Bake rolls until browned, 30-35 minutes. Let rolls rest 5 minutes in the pan, then turn out onto your serving platter.


My mom took Kiersten (and the rest of us) out for her birthday dinner on her actual birthday. Thank goodness for that, because during Nolan's nap on her birthday, I made her cake, and between that and decorating the porch as a surprise for when she got home, I was exhausted. 

K had asked me if I could make zebra striped icing, but I told her I wasn't quite ready to tackle that task just yet. So I decided to surprise her with a marbled cake made to look like zebra stripes. I used the cake recipes from the Williams-Sonoma book Cupcakes for the batters. They had the consistency I needed for the effect I wanted. I had already made these flavors for my aunt's wedding cake last summer, so I knew they were good. I added Wilton black color gel to the chocolate cake batter. Unfortunately, I had gotten distracted at some point and forgot the butter!! Luckily, since it was marbled with the perfectly-made vanilla cake mix, it wasn't a complete disaster. I've determined now that I have to make the chocolate cake again to redeem myself.  I used the Wilton buttercream recipe with their Rose gel color for the icing. The effect of the cake did not disappoint.
I found the zebra print cake board at Walmart!

Birthday dinner #2 was made up of her favorite foods. Unfortunately, she had what we call a non-eating day. Non-eating days are where she doesn't eat foods she normally loves. It's frustrating, as I'm sure you parents can well understand. She asked for bacon-wrapped chicken. I had made it once after finding it on Pinterest, and we loved it. I also made corn on the cob and sweet potato fries. 

The birthday girl's plate.
Yeah, we went all-out with the zebra print.

Now for the craft project, a quote sign for her room. I knew the quote I was going to use ("All You Need is Love" - her all-time favorite song); I also knew that I wanted to use a cool painting technique. The big issue came about when I couldn't find my Cricut vinyl. If you've read my previous post, you know that wasn't really a shocker. So, I was on the hunt for both a painting technique AND a font to use to either hand paint or trace onto the canvas. After searching the 'net for a week, I found a technique AND a font. I wasn't thinking ahead to the blog, so I forgot to bookmark the video I used for inspiration. Basically, take acrylic paints in your desired colors and dilute them with equal parts water. Tape off the edges of the canvas so you have a lip to prevent paint from going over. You then pour the paint onto the canvas in sections and tilt the canvas to get the effect. I used an offset spatula to "push" the paint to the edge of the canvas, which is what was done in the video. Once the canvas was dry, I used the "Happy Days" font from my go-to font site, dafont.com, and printed out my song lyric. I cut it out and traced it onto the canvas, then painted it in using black paint, and then painted the edges of the canvas purple. Once the entire project was dry, I put on a layer of Mod Podge Matte. Her face when she saw it was pretty spectacular. Especially since she actually READ it herself. 

Now to find a spot to hang this!

Whew...Okay. Time to finish taking down all the zebra décor and make the house look like fall has descended upon us. That means a trip up to the attic. Fun part: in 3 weeks we're doing another week-long celebration for Richard. I think I need a nap now, just thinking about it. Maybe I need to hit up Starbucks for a PSL. Whaddya think?


Till next week, my friends!


Wednesday, August 28, 2013

Tasty Trifecta

"I hope you have a child who acts just like you!"

I'm fairly certain we've all heard that at some point in our lives. Unless you're a perfect angel. While my mom never came right out and said those words, I have a feeling she thought them quite often. Like when she opened my bedroom door to carefully place my laundry on my crumpled bed, never fully entering the room for fear of getting lost in the sea of clutter. Or when she would carefully tailor her menu to suit my absolutely insane pickiness. My brother was the "good" kid who ate everything. Even the weird stuff. He even ate broccoli. Without cheese!

Well, it happened. As Richard and I struggle to keep clutter at a minimum (not good for 2 clutter-nuts to marry - oops), we now have two children who help add to it all. My precious little princess is just as picky as I used to be. We're lucky in that she loves fruit, yogurt, and even non-fried fish. But she's just as much into texture as I am. No mushy anything. If it's crunchy or spicy, she'll dive right in. 

This blog is serving as my diary of exploration into the world of new. Mostly new recipes. I get bored and frustrated cooking the same things over and over. The picky eater in me is slowly disappearing. While there are still quite a few foods I won't touch, I'll at least give most of them a try. Two items from last two days' menus, especially yesterday's, pushed my boundaries. The third served as a little reward.

First, I give you Tortellini-Chicken Soup! 
Look at all those healthy ingredients!
See that green stuff and the pinkish stumps in there? That's Swiss chard! Do you see the carrots?!? There's also onion and garlic, as well as the obvious chicken & tortellini. I have never ever had Swiss chard. And carrots, for me, need to be almost mushy. I even ate the leaves! Give me a minute while I come down from my self-congratulatory high. This was a hit, and heated well as leftovers for lunch today. For the kids, I just gave them the chicken, carrots & pasta. Giving a two-year-old broth...not a good idea. 

This recipe was adapted from Cuisine at Home magazine. They're pretty stingy with their recipes. If you don't get the magazine, you basically don't get the recipes. The original called for turkey. Well, I wasn't about to cook an entire turkey to make soup, and they don't exactly sell rotisserie turkeys at Ingles or Walmart. So, chicken it was. I also didn't put in any fennel, as I already have tried that & don't like the bitterness of it. Oh, and I actually forgot to buy kidney beans, but will surely add them next time. I was so proud of myself for getting the chard that I forgot the beans! Anyway...here's the recipe:

2 c each: sliced carrot, diced onion, diced fennel bulb, diced Swiss chard stems (don't throw out the leaves, but DO wash them, for sure)
2 Tbsp minced garlic
4 tsp dried Italian seasoning
1/2 tsp red pepper flakes
1/4 tsp nutmeg
2 Tbsp olive oil

1/2 c dry Marsala
1-2 Tbsp chicken base (like Better than Bouillon)
12 c low sodium chicken broth

4 c roasted turkey (or chicken)
3 c (9 oz) refrigerated cheese tortellini (dried works)
8 c chopped Swiss charred leaves, rinsed (1 bunch)
1 can red kidney beans, drained & rinsed

1 Tbsp lemon juice
Salt & pepper to taste
Grated Parmesan (I happened to have a fresh block - YUM)

Sweat carrot, onion, fennel, chard stems, garlic, Italian seasoning, pepper flakes, and nutmeg in oil in a large pot over  medium heat for 10 minutes, stirring occasionally.

Deglaze pot with wine and simmer until nearly evaporated; stir in chicken base. Add broth and bring to a boil, then reduce heat and simmer 10 minutes.

Add turkey/chicken, tortellini, chard leaves, and beans; simmer, partially covered, until tortellini are cooked through, 8-10 minutes. 

Stir in lemon juice and season with salt and pepper. Serve with grated Parmesan.


For dessert, I had an assistant. Kiersten got all dolled up in her apron and chef's hat and helped make the brownie base. She even used her mini spatula to stir the dry ingredients as I mixed up the wet ingredients. This recipe is from Cooking Light magazine, and they are much more generous with their recipes, thank goodness. The whole looking down & up of writing out a recipe can be dizzying, especially after midnight. Even for a night owl/insomniac like myself.


This recipe calls for 2 Tbsp of evaporated milk to be added to chopped chocolate. It came out WAY thin. I tried again this afternoon with just 1 Tbsp, and it was too thick. Goldilocks found that maybe 1 1/2 Tbsp will make it just right.

The aroma's from tonight's main course are still lingering. While the side dishes of rice & black beans were pretty mundane, the feature, Coffee-Rubbed Flank Steak (from Food Network Magazine), made us feel like we were living above our means. The original recipe called for skirt steak, but I had flank steak, so that's what I used. We were not disappointed. It wasn't until after she had eaten all her meat that we told Little Miss Picky what went on it. Her reaction, "And I ate it!" Insert proud parent moment here. Oh, and the pic of the steak, too...

I didn't add a pic of the onions, but boy did they add a layer of depth to the flavor.
I skipped out on the peppers out of sheer laziness.

And with this entry done, I'm off to La-La land for a little while, till I'm dragged out of bed to make my kindergartener's hair presentable for school, with the promise of a fresh pot of coffee made by my husband. Seriously...he makes my own pot, since he gets up WAY early and knows I'm a snob and don't like coffee if it's been in the pot for over half an hour. I really do have an awesome husband. 

Saturday, August 24, 2013

Cinnamon Rolls (or CinnaNOM rolls)

Bakeries. I have to say that bakeries are probably one of my weaknesses. Any time I'm in the vicinity of a mom and pop store, especially bakeries, I want to rush right in, then take my sweet time perusing the place. This is most likely why I love Asheville and the area so much. The motto around town is "Buy Local."

That said, every morning last school year when I was teaching, I would pass by the Fletcher Village Bakery. It had recently replaced a bakery I knew and loved, and I was hesitant to give it a try. But one morning when I was passing, I had not had breakfast, and my stomach told me to turn. Now. So I did. It was the beginning of a love affair that made my husband jealous. Jealous, because he could not partake in such freshly-baked goodness the way I could. My favorite indulgence was their scones. More specifically, their cheddar-green onion scones. Let it be known that I generally dislike green onions. But this buttery, flaky, brown-cheese-edged wedge of heaven made me forget that little fact. And occasionally I'd surprise my husband with a chocolate croissant or a cake. Their chocolate cake with peanut butter buttercream especially proved to be a big hit. 

One day, on one of the last workdays of the year, I took my daughter with me. I decided to treat her to breakfast there. She stood, wide-eyed, as she tried to make her decision. She excitedly pointed to a cinnamon roll that was almost the size of her face and said, "I want THAT!" We paid for our order and headed to the school. I messily cut up half her roll and she dove in while I tried not to make obscene noises over my scone. When she was done, I got up to put away the second half, and she informed me that she wanted to eat that half, as well. And she did. Thus began HER love affair with baked goods. Cinnamon rolls, more specifically. I then confided to her that I once worked at the bakery of a steakhouse and actually had made cinnamon rolls. From that moment on she constantly asked if I would make them for her. This week, as a special breakfast for her first day of Kindergarten, I decided to surprise her with them. Needless to say, it woke her from her foggy sleepy stupor when daddy showed them to her. I stayed up SUPER late to make them, because I started late, and it was a 4-hour process. But boy, was it worth it!


(The corner piece missing was my tester. You can't just make 
these and wait until the next morning to test how they truly are. 
You have to try them warm!)

I got this recipe from Cuisine at Home magazine. What I love most about them is that they don't taste at all yeasty. The icing is vanilla glaze (it actually calls for vanilla bean paste, but I'm on a budget here & used vanilla extract), but I'm sure you could change it up for anything else. They also have a variation to make them as sticky buns, with a caramel glaze and nuts. I'll be making those for her birthday weekend, when my mom comes up. She's a sucker for caramel. 

One other note: if you know of ways to make this gluten-/vegan-friendly or just lighter in general, add it to the comments! I'm always looking for variations on baked goods when I take them places!

Cinnamon Rolls with vanilla bean frosting

(serving suggestion is 12, but I made about 22)

Dough:
1 1/4 c whole milk 
1/2 c vegetable shortening
1/4 c packed brown sugar
1 pkg active dry yeast (2 1/4 tsp)
1 c old-fashioned rolled oats
1/2 c cold water
4 c AP flour
2 eggs
1 1/2 tsp table salt
Filling:
1 1/2 sticks softened unsalted butter (12 tbsp)
1 c packed brown sugar
2 tbsp ground cinnamon
1 tsp table salt
Frosting:
4 tbsp softened unsalted butter
8 oz powdered sugar (2 c)
2 tbsp whole milk
1 1/2 tsp vanilla bean paste (same amt of vanilla extract works)
1/4 tsp table salt

Heat 1-1/4 c milk, shortening, and 1/4 cup brown sugar in a small saucepan over med-low until shortening is melted; transfer to the bowl of a stand mixer. Let mixture cool to 100-110 degrees (this takes forever! I ended up putting the bowl in a sink of cold water - just make sure the shortening doesn't begin to congeal). Whisk in yeast & proof until foamy, about 5 minutes. If it doesn't proof, check the date on the yeast. 
Soak oats in hot water until all water is absorbed
Add 2 c flour & eggs to the yeast mixture & mix on low using paddle attachment until combined. Switch to dough hook & add remaining 2 c flour, oats, and 1-1/2 tsp salt. Mix on low until incorporated, then increase speed to med & mix until dough pulls away from the bowl, about 7 minutes. 
Transfer dough to a bowl coated with nonstick spray, cover with plastic wrap, and let rise until doubled in size, about 2 hours (mine took 90 min). Lift edges of dough away from bowl & press air bubbles out with your hands. 
Combine filling ingredients.
Coat a 9x13 pan with butter (I used cooking spray). Transfer dough to floured surface and gently press to remove any air bubbles. Divide dough in half and roll one piece into a 10x16-inch rectangle. 
Spread half the filling over the dough, leaving a 1/2-inch border. Starting at the short end, roll dough, jelly roll-style, into a log. Repeat rolling & rolling with second dough half. Freeze logs 10 minutes to firm. (Note: I started rolling the log on the LONG end to get smaller rolls.)
Slice each log into six (or 12) rolls and arrange in prepared pan. Cover with a towel & let rise until puffy, about an hour. Remove towel.  
Heat oven to 375. Bake rolls until brown, 30-35 minutes.
Meanwhile, for the frosting, beat all ingredients with a mixer until combined. 
Cool rolls in pan for 10 minutes, then top with frosting.

I hope you enjoy these as much as my family & friends have!! 

Laura